Current Digital Issue
|
|
Click to read.
|

Past Digital Issues
|
|
Click to read.
|


Service Technician Training: Service Tool Basics
By Gary Weidner / Published July 2015
Editor’s Note: This service technician training series was published previously from September 2008 through June 2014 in Cleaner Times|IWA. It is being republished with the recognition this material is not exhaustive of the subject at hand, but rather to present to new service people an all-important fundamental understanding of how things work.

Future columns on service matters will refer to various tools and equipment. But for now, I want to offer the beginner suggestions for tools useful in servicing pressure washers. Of course, you will need a tool chest of some kind in which to store your tools in the shop. But be sure to think about how to carry along the tools you’ll need with you on service calls.
How Ya Gonna Tote’em?
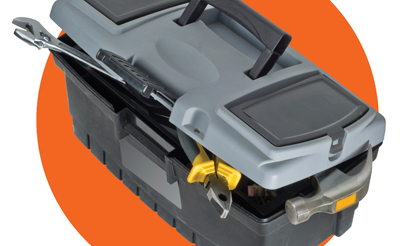 Here’s one approach: Keep tools that aren’t likely to be needed on service calls in your shop chest, and keep tools you will usually take on service calls in “totable” tool boxes. The best boxes for field use, while reasonably compact, have one or more drawers or trays so that you don’t have to dig through tools to get at the one you need. I like the all-plastic boxes made by Plano Molding Company. For example, their #858003 has a deep top compartment plus four drawers. The drawers are on slides, and the boxes are immune to rust and dents. Look them over at www.planomolding.com, and don’t overlook their tackle boxes, which are excellent for small parts and small tools.
For Your Closest Friends…
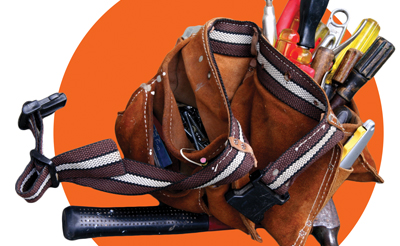 The so-called 80/20 law of life seems to even relate to tools. Probably 80 percent or more of your work is done using 20 percent or less of your tools. If that is the case, why not keep a few of those trusty friends always at your fingertips by carrying them at your side in a “lineman’s” tool pouch? You’ll find that the pouches come in a variety of sizes and compartmental arrangements. Attach the pouch to a carpenter’s belt—they’re wide, adjustable, and have quick-release buckles.
Here’s what I carry in my pouch: 6, 8, and 10 in. adjustable wrenches, four different screwdrivers, two nut drivers, an o-ring pick, diagonal cutters, pliers, a utility knife, three stubby box wrenches, two allen wrenches, a flashlight, a medium-size spring clamp, thread sealing tape, and a rag.
I’ve found that the best bet for the spring clamp is a “Pony” #3202 or a “Stanley” #83-262, or similar. These clamps are steel, which is prone to rusting, so you may also want to investigate the plastic versions that have become available. (But all the clamps have coil springs that get rusty.) The clamp has a multitude of uses. It’s a quick way to hold a wash gun “on” (for testing only, with suitable caution), and it’s a handy way to temporarily hold aside wires, hoses, etc. that might get in the way when you’re working.
Include in your pouch whatever you find yourself constantly using. Wearing the pouch may feel strange at first, but you’ll soon feel naked without it. In the shop, it saves steps. In the field, it helps avoid tools being left behind at the job. (Then too, some field sites have precious few useable surfaces on which to lay your tools.)
Make Your Own
One of the satisfactions in life is to make something yourself, and all the more so if it’s a tool you’ll use a lot.
 You can easily make yourself a handy “pick”—an invaluable tool for changing quick coupler o-rings and similar tasks. The pick in my pouch is made from a used oil burner electrode. If it should get lost, another can easily be made.
To convert the electrode to a pick, all you have to do is straighten the exposed wire, grind a finer taper on the point, then bend the last quarter inch or so of the tip to, say, a 45-degree angle (see sketch). Leave the porcelain insulator in place as a handle. You may want to experiment with various, different geometries. Also, if you service a variety of equipment brands, you’ll come across different styles of electrodes. Generally, American electrodes are larger and European electrodes smaller (except those for down-fired burners).
If you’ve made a useful tool and wouldn’t mind sharing the idea with the rest of us, send a note describing it to michael@adpub.com, and attach a photo if you can.
A Bit of Philosophy
In its service coverage for August 2008, Oilheating magazine presents a little story. A service veteran was assigned to teach an apprentice mechanic. “One day when they were working together, the apprentice looked over the old-timer’s shoulder and out of honest curiosity asked, ‘Why are we doing it that way?’ ”
“ ‘We do it that way, kid, because I say so. Do you understand?…Do you have any more dumb questions?’ ” said the veteran.
The story goes on, “As the years went by, the apprentice grew in experience, but he never did get that solid base of knowledge that he needed to be better than average. He always hesitated to ask questions.”
The article explains that “You can work in the field for years without really understanding how key system components work. If you put the parts together and everything works as it should, you’re home free! But if your system doesn’t perform as promised, you’re going to have to do some troubleshooting. And successful troubleshooting begins with a knowledge of how the system [and] components really work.”
By the way, as a distributorship for oil-fired water heating equipment, your company may benefit from past issues of Oilheating magazine. Although a substantial portion of the magazine is devoted to fuel oil marketing and delivery, the dealers it goes to in the oil heating industry have service departments, and so there is considerable coverage of oil heating service.
Next month, we’ll continue the subject of your service tools.
Go Mobile